fbpx

Train Piñata Tutorial

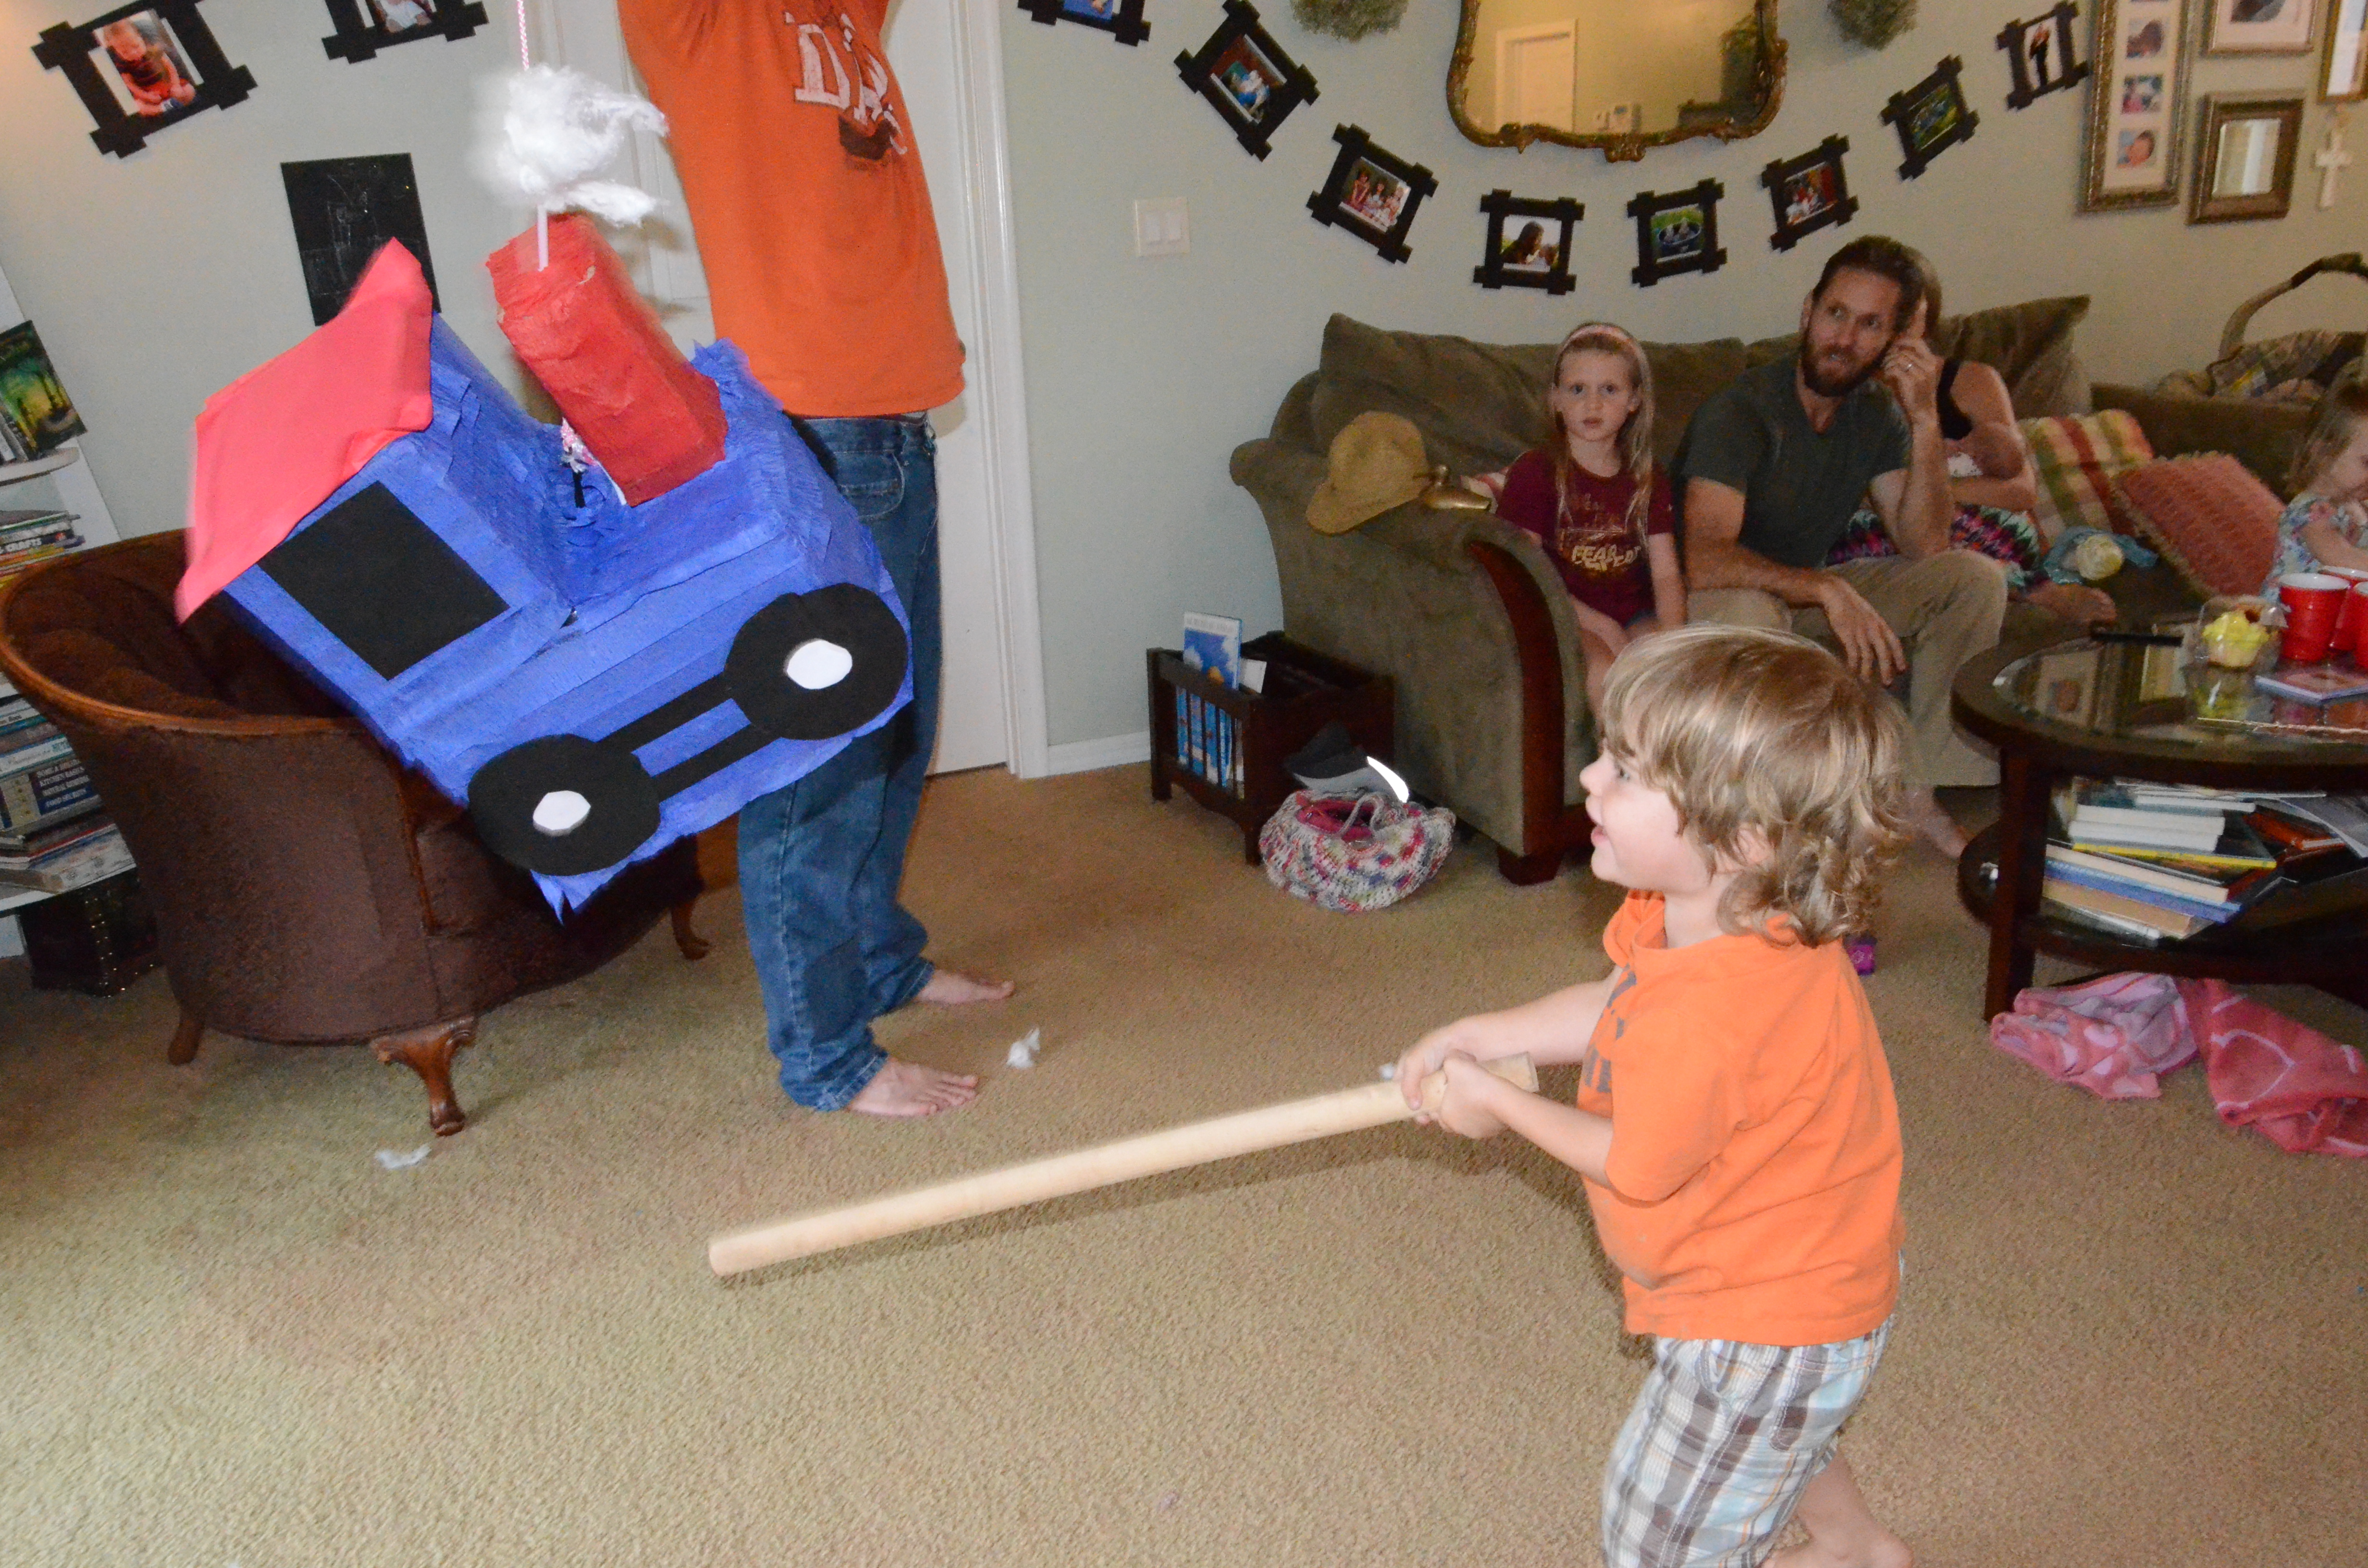
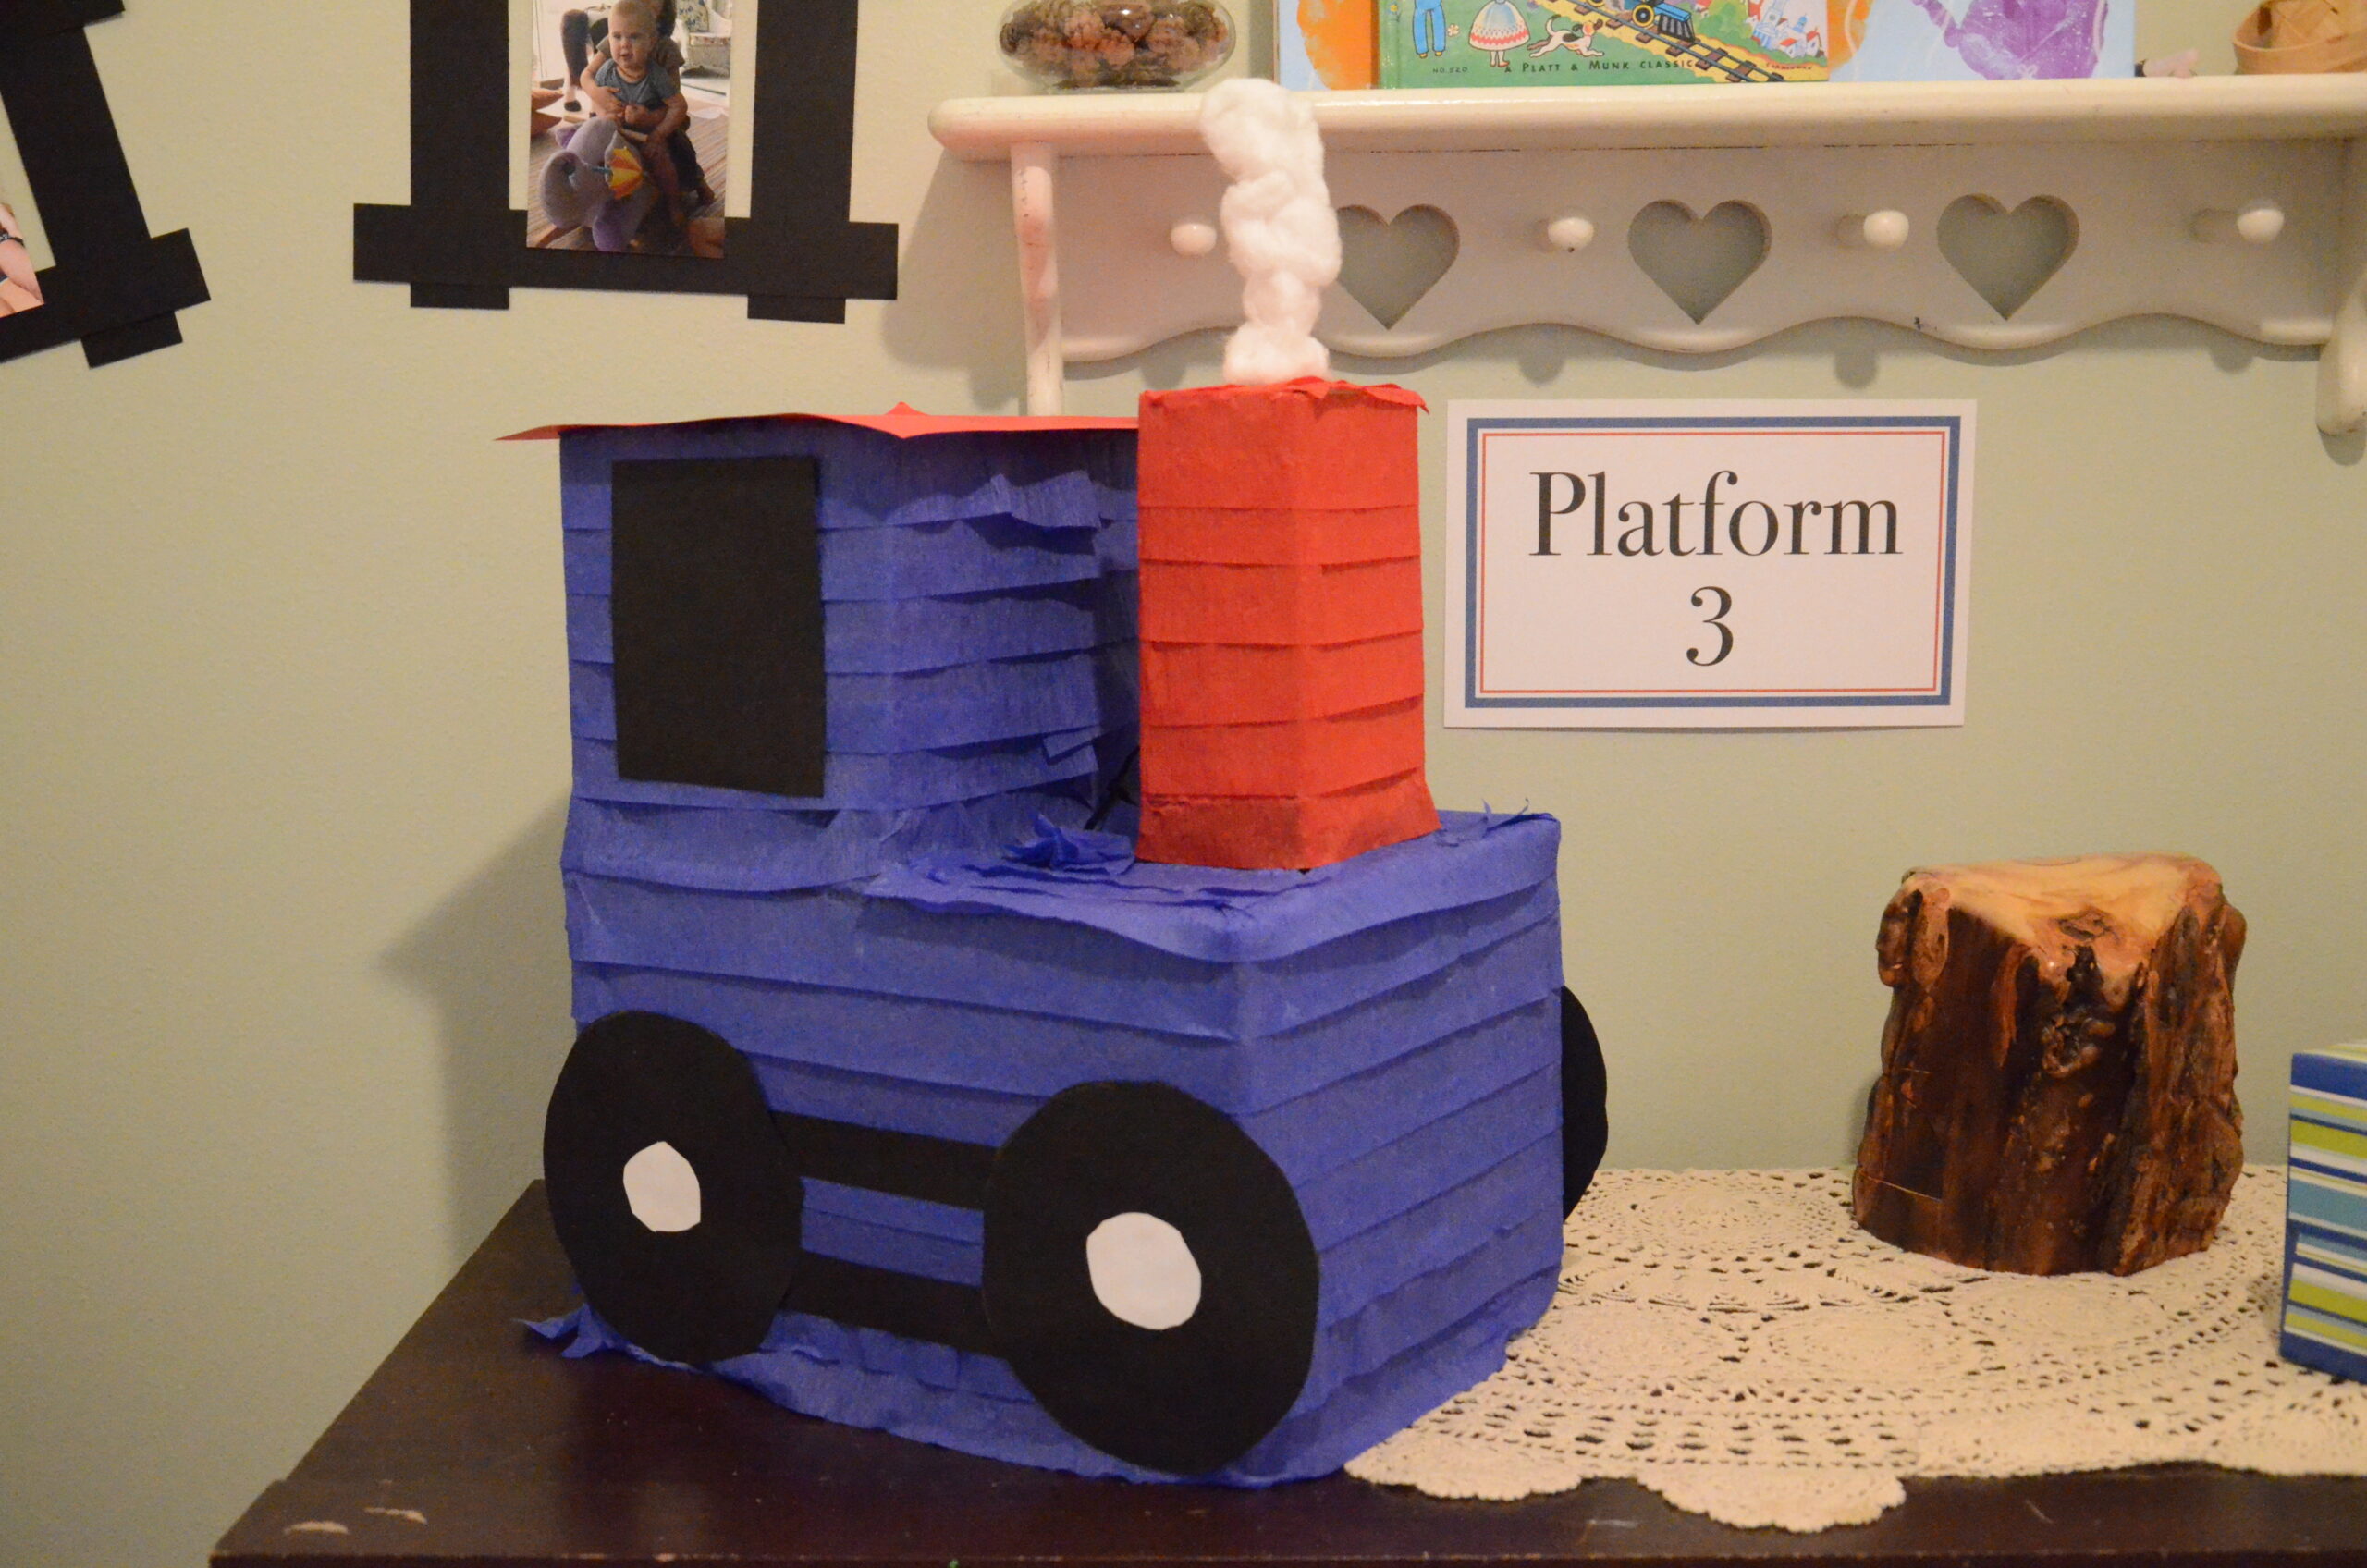
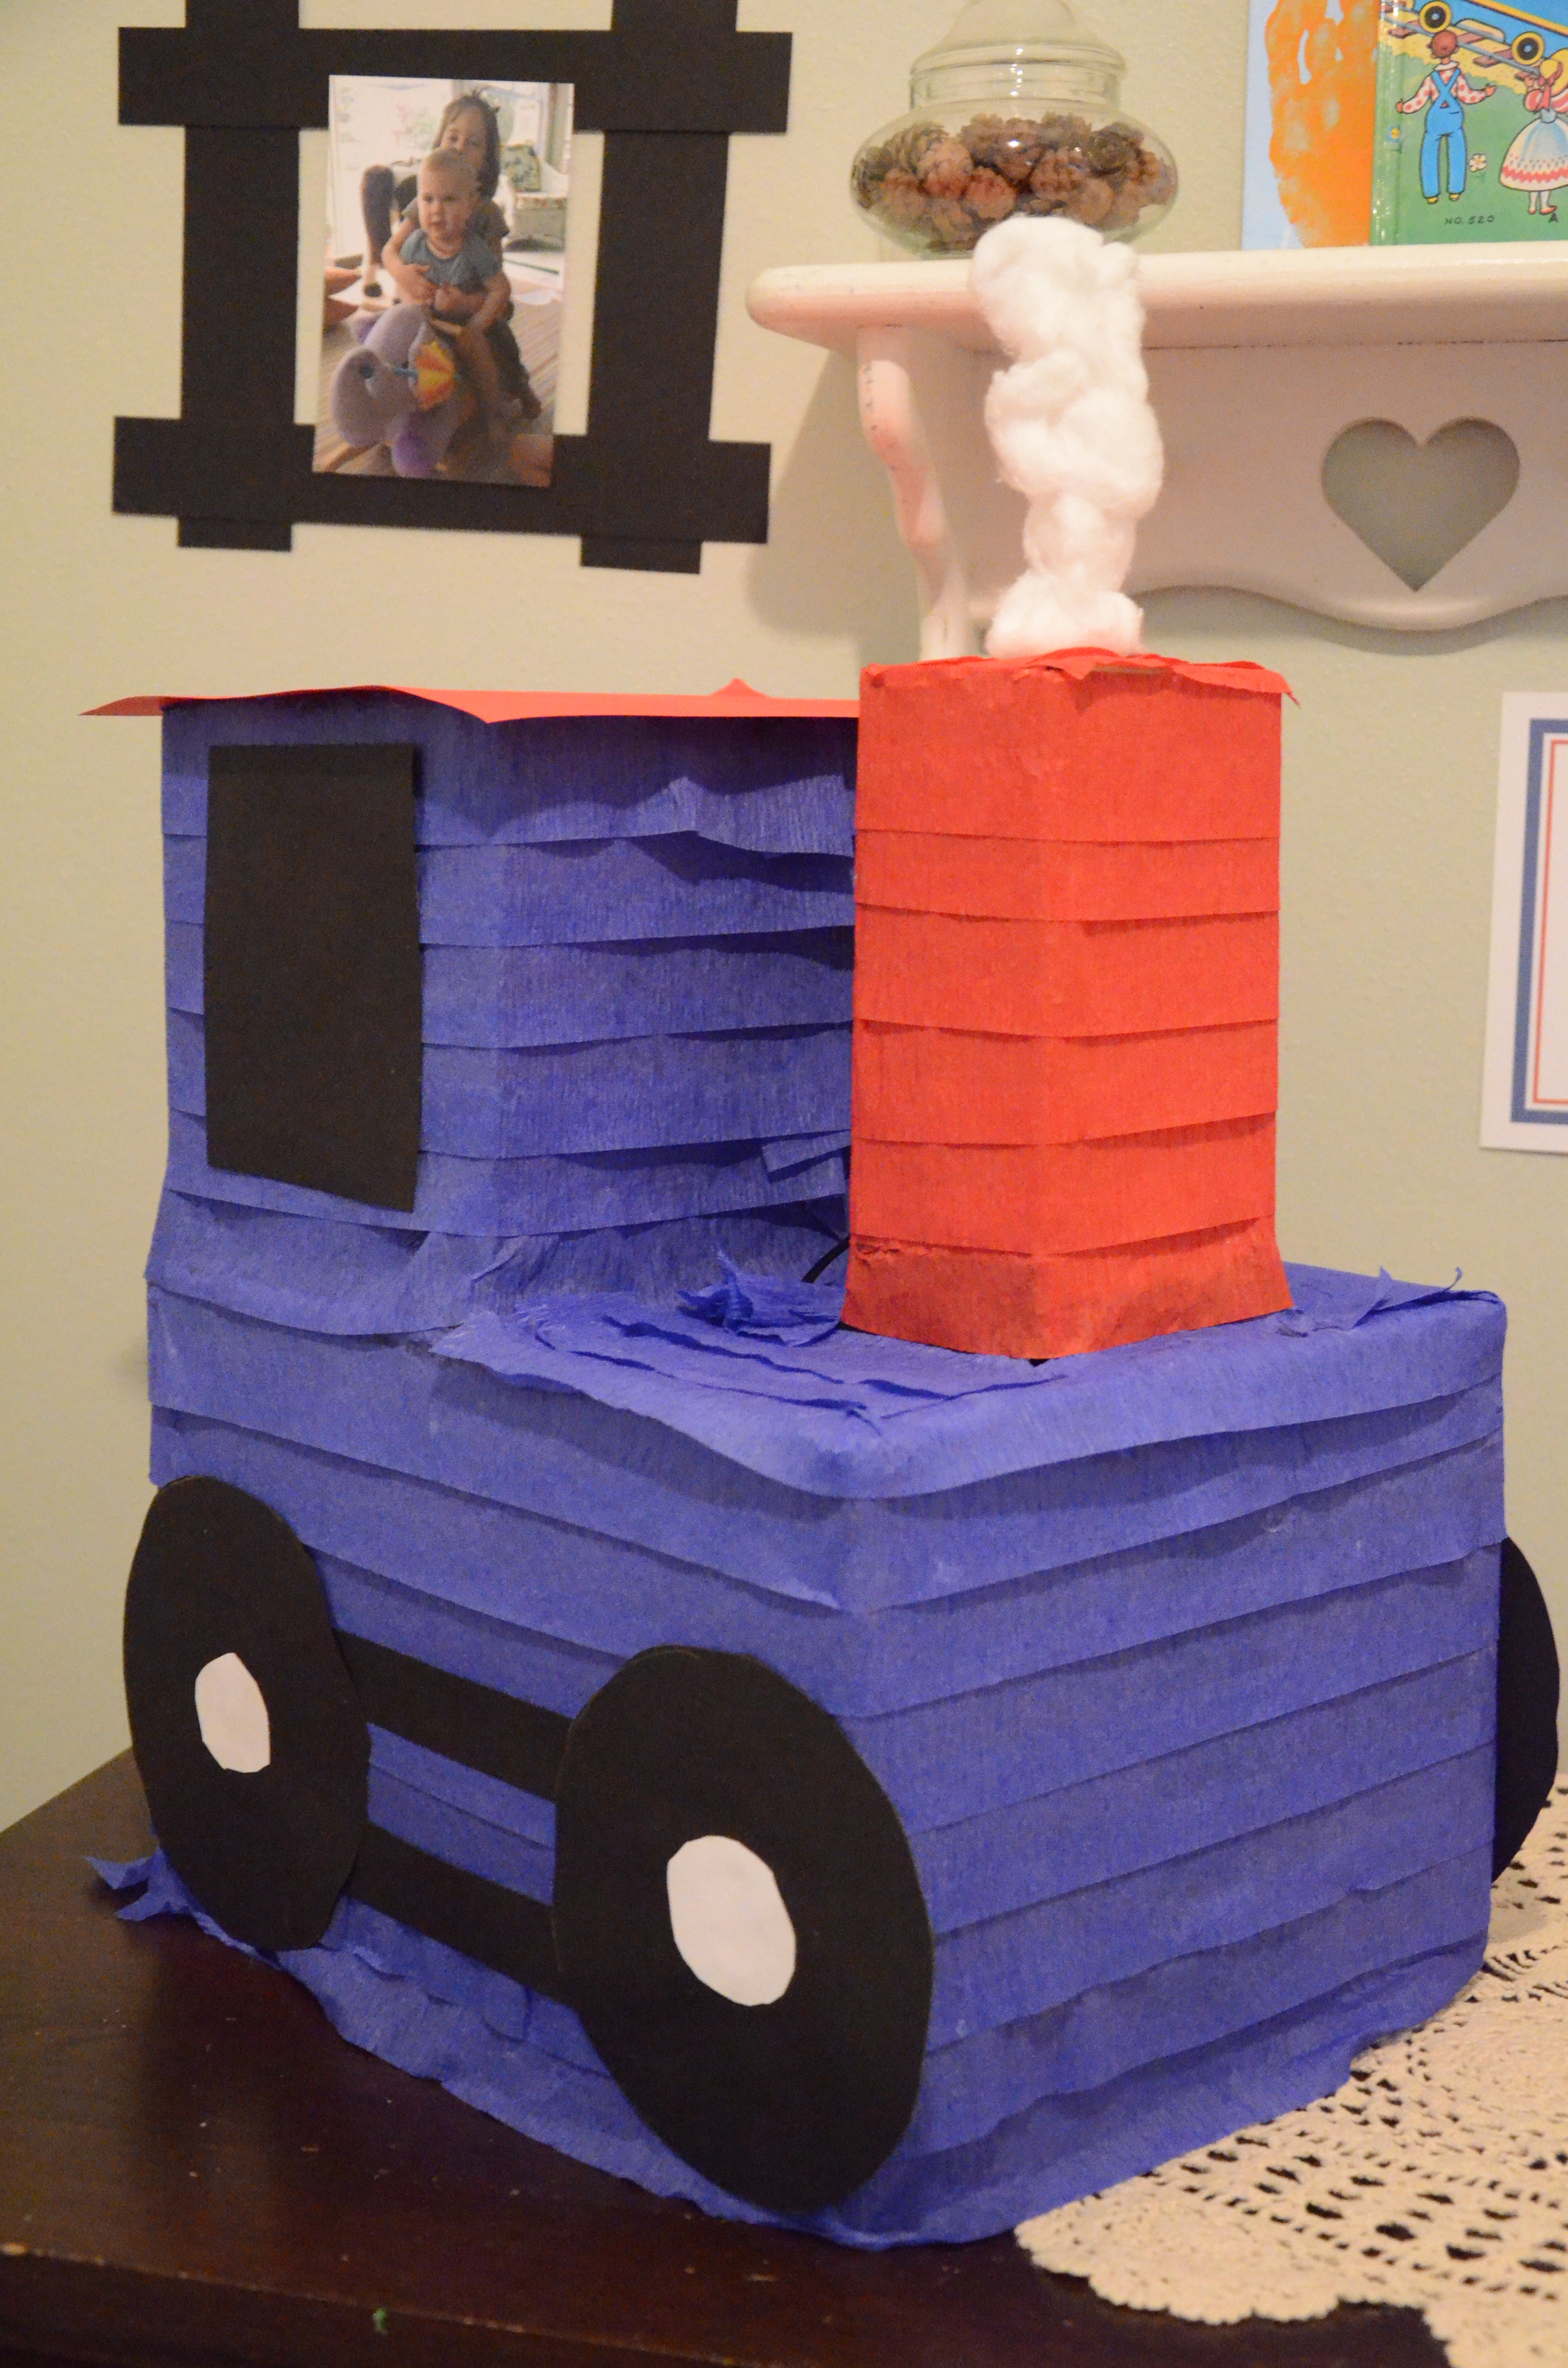
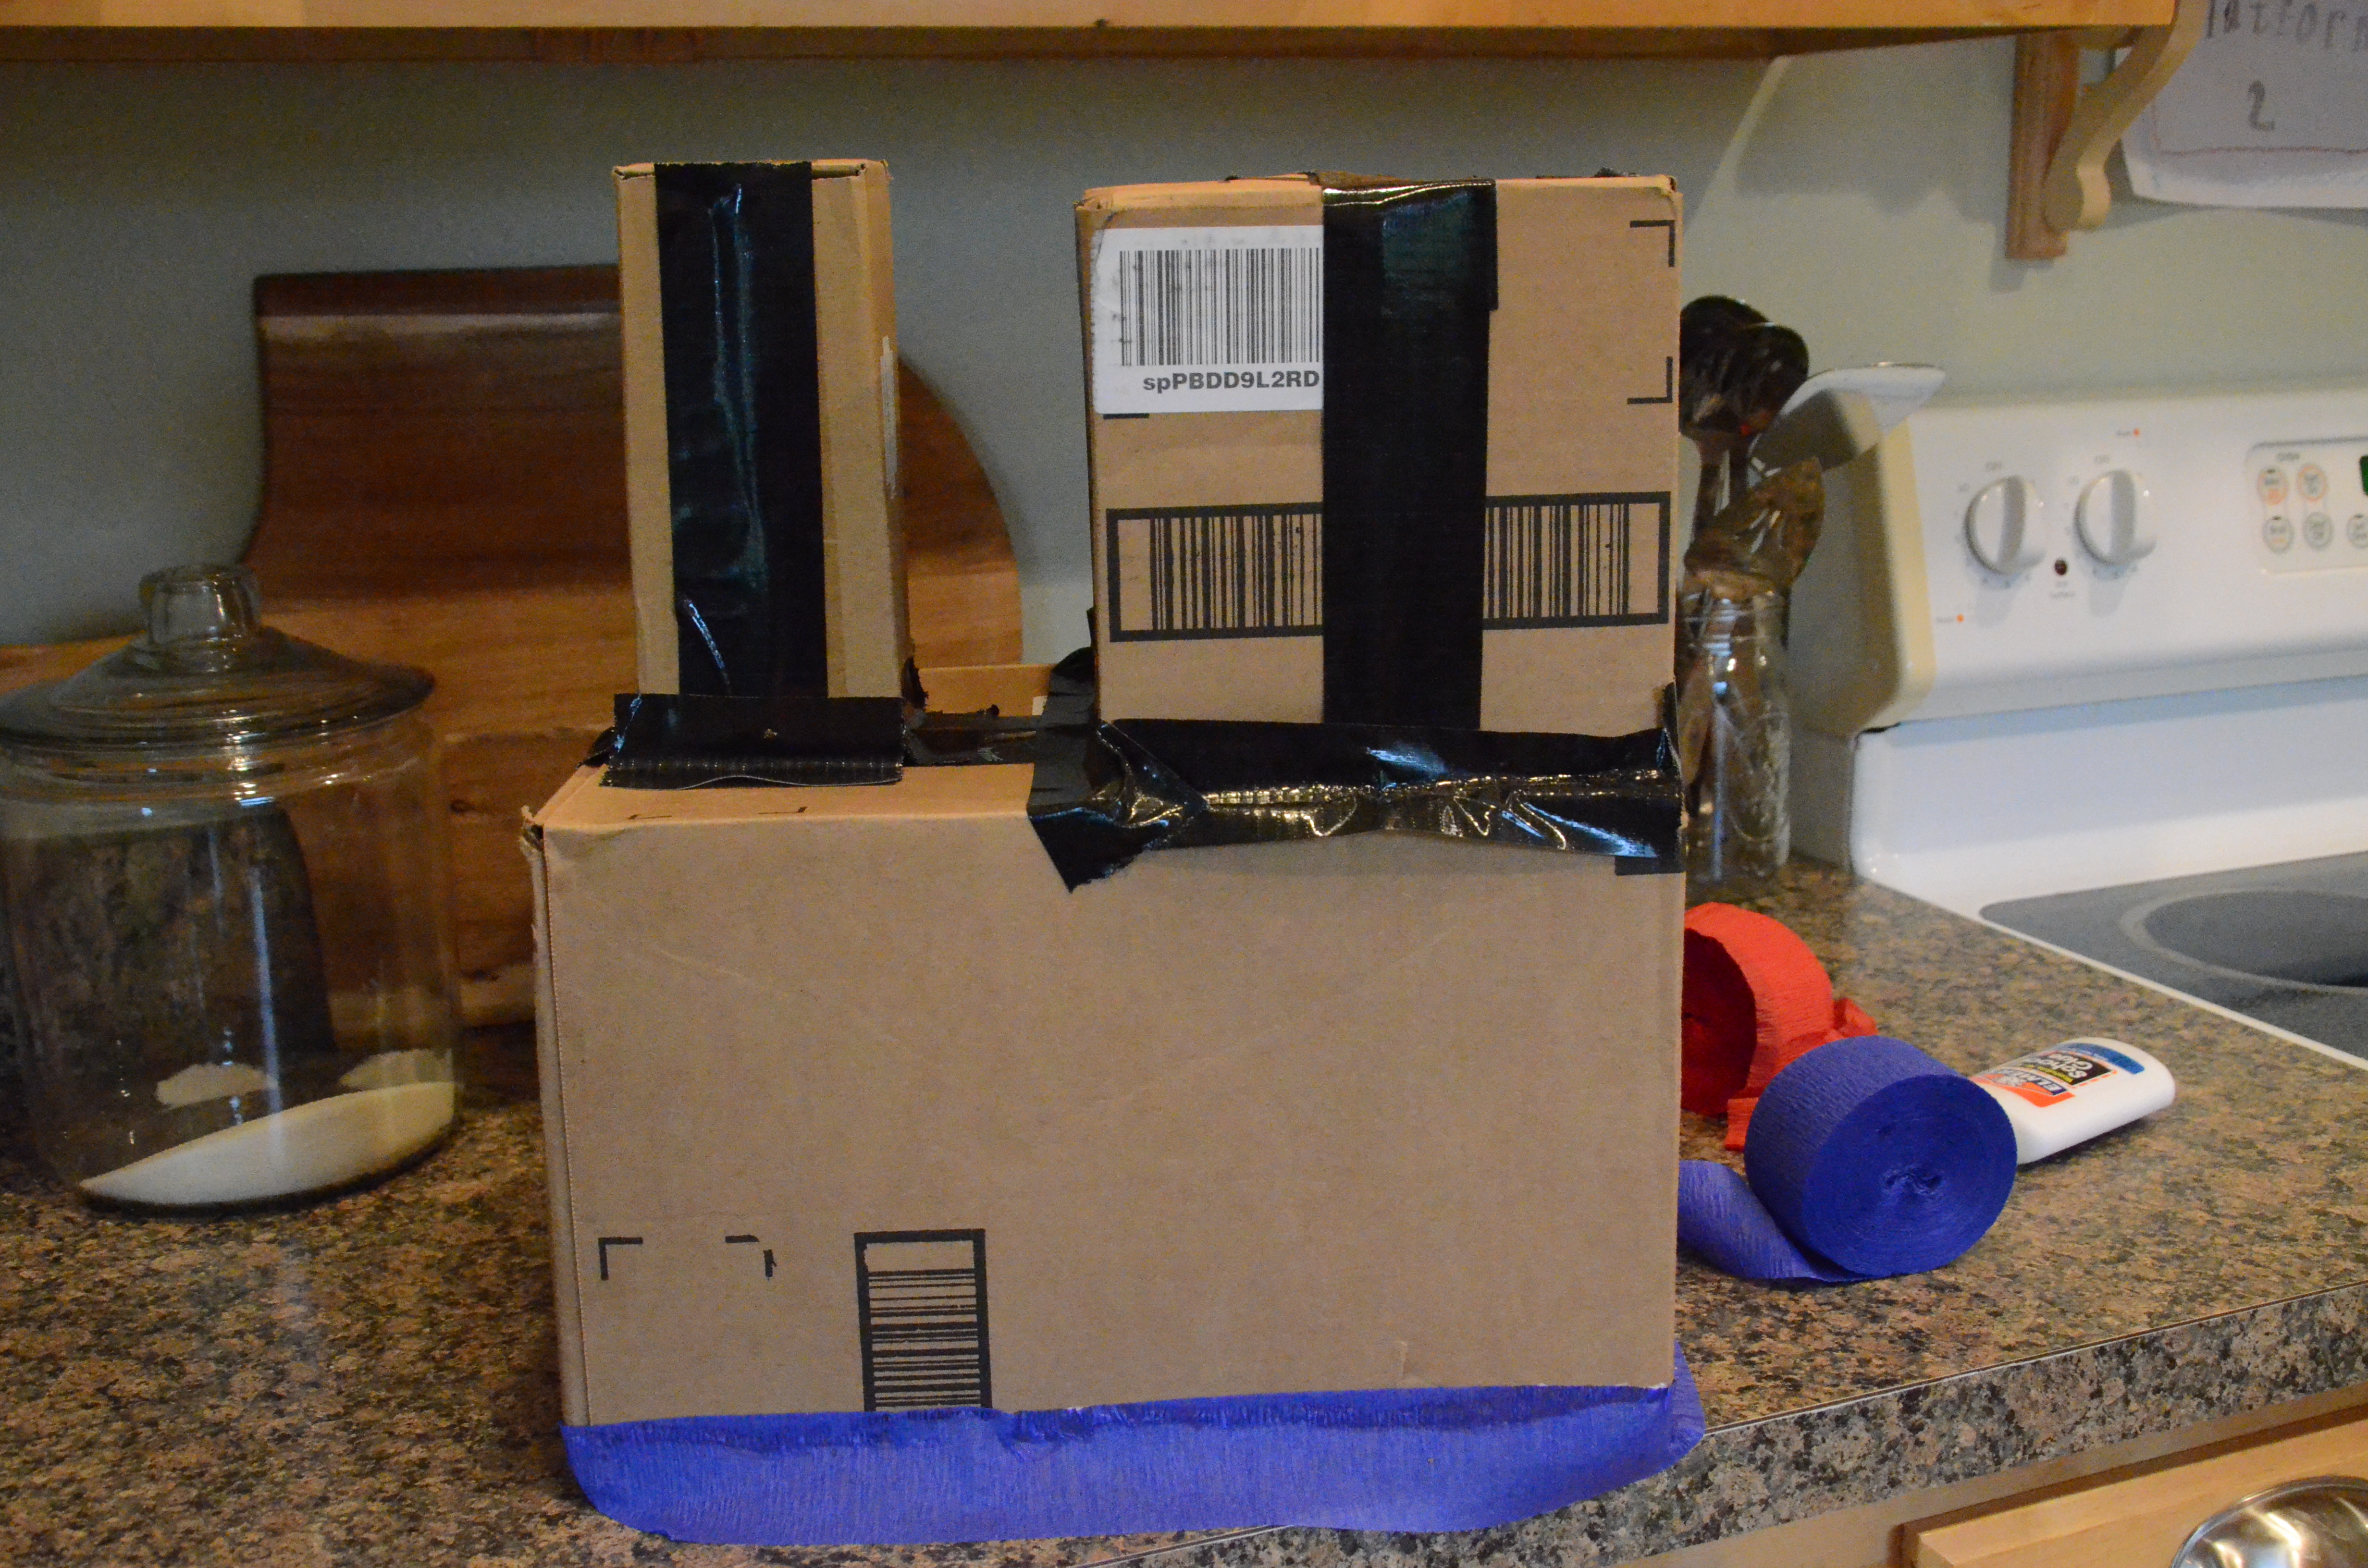
Reed turned three yesterday (Oh dear, my sweet baby boy….No!  Hold it together, Christy!), and for his party theme he chose trains.  At first I wasn’t sure if I could manage a piñata for this party…but then it came to me.  Boxes.  Boxes are the key.

DSC_3597

Supplies

  1. Boxes
  2. Party Streamers
  3. Glue – Elmer’s school glue worked great for me.
  4. Scissors
  5. Tape – I used duct tape because it had it right next to me at the time.  Packing tape will also work great.
  6. Black paper
  7. A sheet of colored paper for the roof of the train
  8. Zip tie
  9. One plastic straw
  10. 4 or 5 cotton balls
  11. Something sharp to make three holes in the cardboard

DSC_3589

Instructions

  1.  Train piñatas are super duper easy!  I started with a few boxes, of which we always have lots.  I used one for the base of the engine, one which I cut in half and used both halves for the cab of the engine, and one skinny box for the smokestack.  You could also use a bread crumb container or another cylindrical container for the smokestack.  After I got them positioned just right, I taped them all together.  DSC_3588
  2. Next, I chose the different colors of party streamers that I wanted to use.  Using the glue, I began attaching layers of streamers, overlapping them slightly.  The glue should be added only to the very top edge of the streamer, not covering the entire thing.  You want each layer to hang down like a skirt.  The layer above should cover the glued portion of the layer below and will hide the glued area of the previous layer.  When you reach the upper parts, you have to be a little more creative when hiding the glued areas.  DSC_3591
  3. Add paper to the bottom of the piñata using the glue.  Cover the entire bottom.
  4. Cut out 4 wheels and 4 train wheel coupling rods (I know it might seem super awesome that I know the technical word for that part of the wheel arrangement (another technical word!)……….but I Googled it.).  Glue them onto your train.
  5. Cut out two windows and attach with glue.
  6. Attach the paper in the color of your choice to the roof of the train.  Just glue around the edge of the roof so you aren’t left with glue lines through your paper after it dries.
  7. Using something sharp, carefully poke a hole in the top of the smokestack.  Stick the straw into the smokestack, leaving about 4 inches sticking out of the top.  Cover it in glue.  Pull the cotton balls apart so they are extra fluffy and attach them to the straw.  Smoke!
  8. Using your sharp something from step 6, poke two holes between the engine cab (which I did not Google, so this might not be the technical term. 🙂 ) and the smokestack.  They should be on opposite sides of the center of the box.  This is where you will attach the zip tie.  It should run through both holes and will be the hanger for the piñata.  I didn’t take a picture of this part…oops!  Check out the picture below and look in between the cab and the smokestack.  Can you see the black zip tie?  It looks like part of a loop there.DSC_3597
  9. Other options for decorating: add a number for the age of your child or a circle to the front for a light!

DSC_3595

There you have your wonderful, super-easy-to-make Train Piñata!  This will make any sweet little boy one happy guy!  By the way, this piñata cost me $3 to make.  Three dollars! 

Also, one extra tip about this piñata and all piñatas made of boxes.  They are super duper strong!!!  At some point, you might have to create some points of weakness using a pocketknife or something.  I usually let them go through the line of kiddos twice, and then I give it some slices here and there.  But they look amazing and are definitely fun!  Enjoy.  🙂

DSC_3713

Share the Post:

Related Posts